Factors influencing the measurement of circles in profile projector measurements
Keywords:
Profile projector, metrology, fitting method, coordinate measurementAbstract
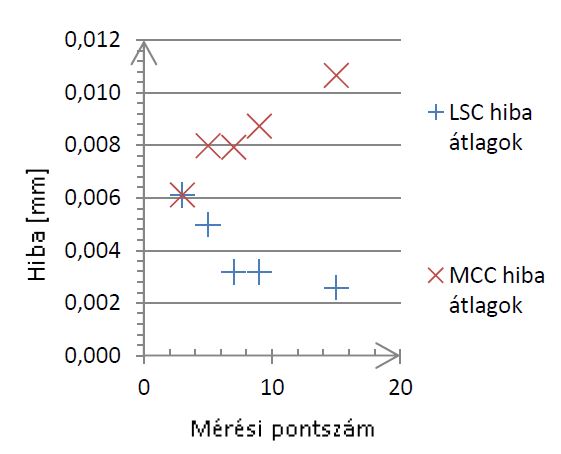
Industry uses a variety of devices to measure dimensions. Profile projectors are widely employed in metrology, and numerous factors affect measurement uncertainty. These elements must be understood for precise and traceable measurements. In co-ordinate metrology, ideal 2 or 3 dimensional geometric shapes are fitted against measured points to determine actual measurement results. Several approaches can fit geometric shapes to measured points. We determine the elements that affect Mitutoyo PJ-H3000F profile projector measurements of circular forms in this study. The paper examines connections between the number of the measurement points, diameter, and measurement error.
References
Farago, F. T., & Curtis, M. A. (1994). Handbook of dimensional measurement. Industrial Press Inc..
ISO 1101:2017 Geometrical product specifications (GPS) — Geometrical tolerancing — Tolerances of form, orientation, location and run-out
Al-Sharadqah, A., & Chernov, N. (2009). Error analysis for circle fitting algorithms. Electronic Journal of Statistics, 3, 886-911.
Chernov, N., & Lesort, C. (2005). Least squares fitting of circles. Journal of Mathematical Imaging and Vision, 23(3), 239-252.
Gander, W., Golub, G. H., & Strebel, R. (1994). Least-squares fitting of circles and ellipses. BIT Numerical Mathematics, 34(4), 558-578.
Umbach, D., & Jones, K. N. (2003). A few methods for fitting circles to data. Instrumentation and Measurement, IEEE Transactions on, 52(6), 1881-1885.
Pratt, V. (1987). Direct least-squares fitting of algebraic surfaces. ACM SIGGRAPH computer graphics, 21(4), 145-152.
Maresca, P., Gomez Garcia, E., Caja Garcia, J., Barajas Fernandez, C., & Berzal Rubio, M. (2011). A proposal for the metrological characterization of circular features with digital optical machines. American Institute of Physics-AIP Conference Proceedings/Volume 1431.
Maresca, P., Gómez, E., Caja, J., Barajas, C., & Berzal, M. (2010). Use of coordinate measuring machines and digital optical machines for the geometric characterization of circumference arcs using the minimum zone method.Measurement, 43(6), 822-836.

Downloads
Published
Issue
Section
License
Copyright (c) 2024 Bánki Közlemények (Bánki Reports)

This work is licensed under a Creative Commons Attribution-NonCommercial-NoDerivatives 4.0 International License.
Bánki Közlemények is loyal to open access for academic work. All the original articles and review papers published in this journal are free to access immediately from the date of publication. We don’t charge any fees for any reader to download articles and reviews for their own scholarly use.
The Bánki Közlemények also operates under the Creative Commons Licence CC-BY-NC-ND. This allows for the reproduction of articles, free of charge, for non-commercial use only and with the appropriate citation information. All authors publishing with the Bánki Közlemények accept these as the terms of publication.

